|
All you need are the right parts, a few
tools, a little patience and some time.
Parts List:
Sportster King tank - new or used.
Short piece (about 4" long) of 2 1/8" exhaust pipe. (Get
a piece of extention pipe with the 2" step down and it'll fit right into your gas bung.)
Gas cap bung. I salvaged the old one after I cut it
out.
Petcock bung. I used a new one but you can salvage the
original.
A piece of 3/4" round stock.
Two 1/8NPT 90 degree elbows.
Some clear, 5/16 gas line.
Two black wire ties.
Some body filler and sand paper.
Tank sealer kit.
Tools:
Electric drill with 3/8" chuck.
MIG or TIG welder. Hell, there's no stress in any of these
areas so you could even braze it. If you don't weld you can have it all done for about $30.oo.
2 1/8" hole saw.
3/4" drill bit.
Round metal file.
Getting Started.
OK. First thing ya wanna do is cut out the stock gas filler bung. If you have
a plasma cutter this is a snap. If you don't yer gonna need some patience to cut around the bung with a hand saw. Take heart,
that's how I did it. Once you have that out, cut out a round piece of
flat sheet metal and weld it in the hole. Next I flipped the tank over,
cut out the stock petcock bung and welded up the hole with another piece of flat sheet metal
Now decide where you want the new extended (or flush)filler neck to be.
I placed mine as high on the tank as I could, that way I can squeeze as much gas into the tank as possible. I center punched
for the hole and using the 2 1/8" hole saw, made the cut. Easy on the drill speed here. Don't let the hole saw wobble around
and egg-shape the friggin' hole!

|
| Dress up the hole with your file. |
Next. Clean up the bottom edge of the gas filler bung
(I used the same one I originally cut out of the tank) and weld it onto the piece of exhaust pipe. Decide how tall you want
the neck to be and add about one inch to set below the surface of the tank. Cut off the excess. Once that's done, position
the new neck in the hole making sure it's plumb - ok, straight, square, whatever and weld da bitch in.
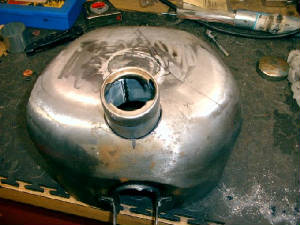
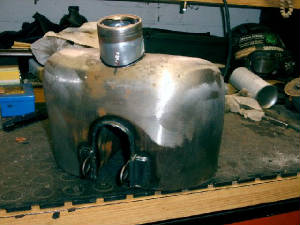
Now it's time to decide where the new petcock
bung is gonna go. I mounted mine on the left side as far back as I could so I can get every available drop of gas out of the
tank. Plus, mounting it on the side looks cool as shit!!!
Hold the pectcock bung in place and mark the
center. Center punch it and drill a 1/4 inch starter hole. Finish it off with the 3/4 inch bit. Then clean up the hole
with your round file. Careful, we want the bung to be a snug fit. Now weld it up.
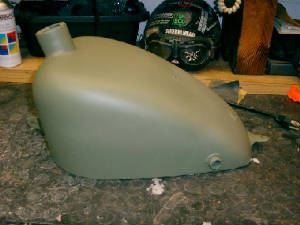
Guess what. We're almost finished! Next is one
of the more critcal steps. If you futch this up it'll look like shit. Now, if you're a little faint of heart you can
stop here and still have a really sweet lookin' tank. But if yer balls are swelling with pride from what you've already accomplished
then lets move on.
You'll need to drill two 3/4 inch holes for the
gas level guage. If you like, you can locate them on the side or the top. As you can see I decided on the top.
I ran a piece of masking tape straight down the
center of the tank and with a fexible straight edge marked a line. I spaced my holes at 5 1/2 inches apart,
center punched them and drilled 1/4" pilot holes. I enlarged them with the 3/4" bit and cleaned up the holes with a round
file.
Throughout the entire process, make sure you keep
removing as much of the metal shavings as possible from inside the tank.
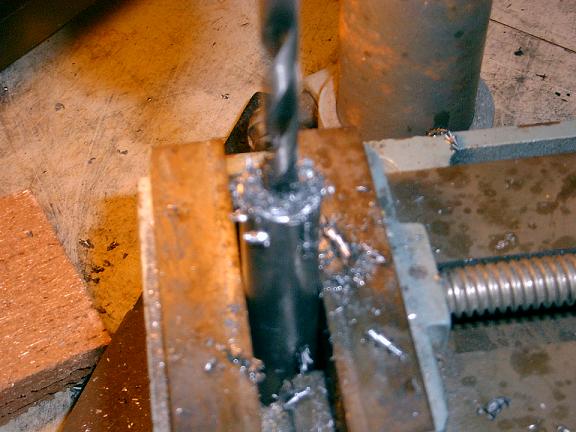
Then I took the 3/4" round stock, drilled it and cut
off two 1/2" long pieces to use as bungs. I tapped them to accept the 1/8NPT 90 degree chrome elbows. I set the finished
products into the holes and welded them in place.
|
| Drilling the round stock. |
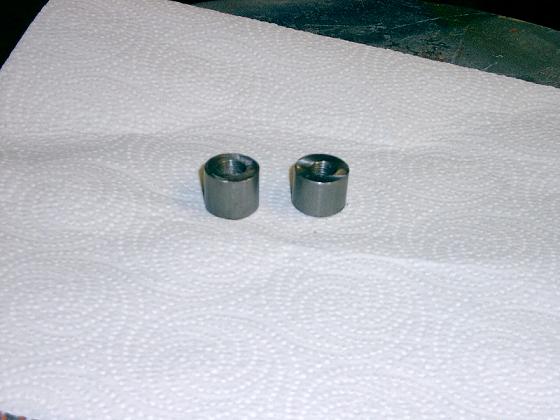
|
| The finished bungs ready to be welded into place. |
After dressing up all the welds with a die grinder
I pressure tested the tank for leaks. Then I degreased and cleaned the inside of the tank thouroghly, let it dry and
sealed it. I use POR-15 tank sealer ( www.por15.com ) because it sets up a nice thick skin inside the tank and won't peal off like some sealers do over time. BUT YOU HAVE
TO FOLLOW THE DIRECTIONS TO THE LETTER!!!!!
Then I touched up the filler neck, petcock bung and gas level bungs with body
filler. After sanding everything down I primed it up and got it ready for paint.
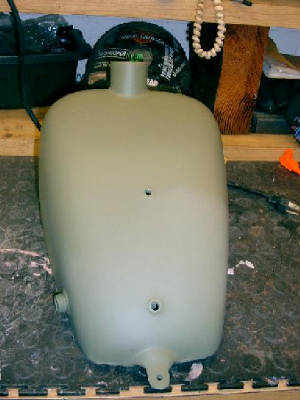
|
| All done and ready to paint! |
After I painted (with a rattle can) and installed
it, I screwed in the 90 degree elbows, cut a piece of clear tubing and pushed it on. Then I used wire ties installed VERY
tightly to hold the tube on the fittings. They never leak.
And there you have it. The finished product installed
on the choppa.
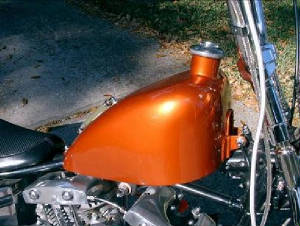
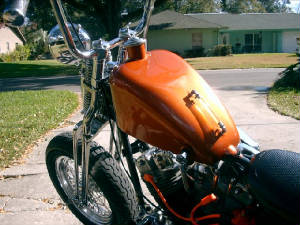
And that's all I have to say about that!
|
